Mint Chocolate Chip Ice Cream Cake: The Easiest (and Most Delicious) Easter Dessert

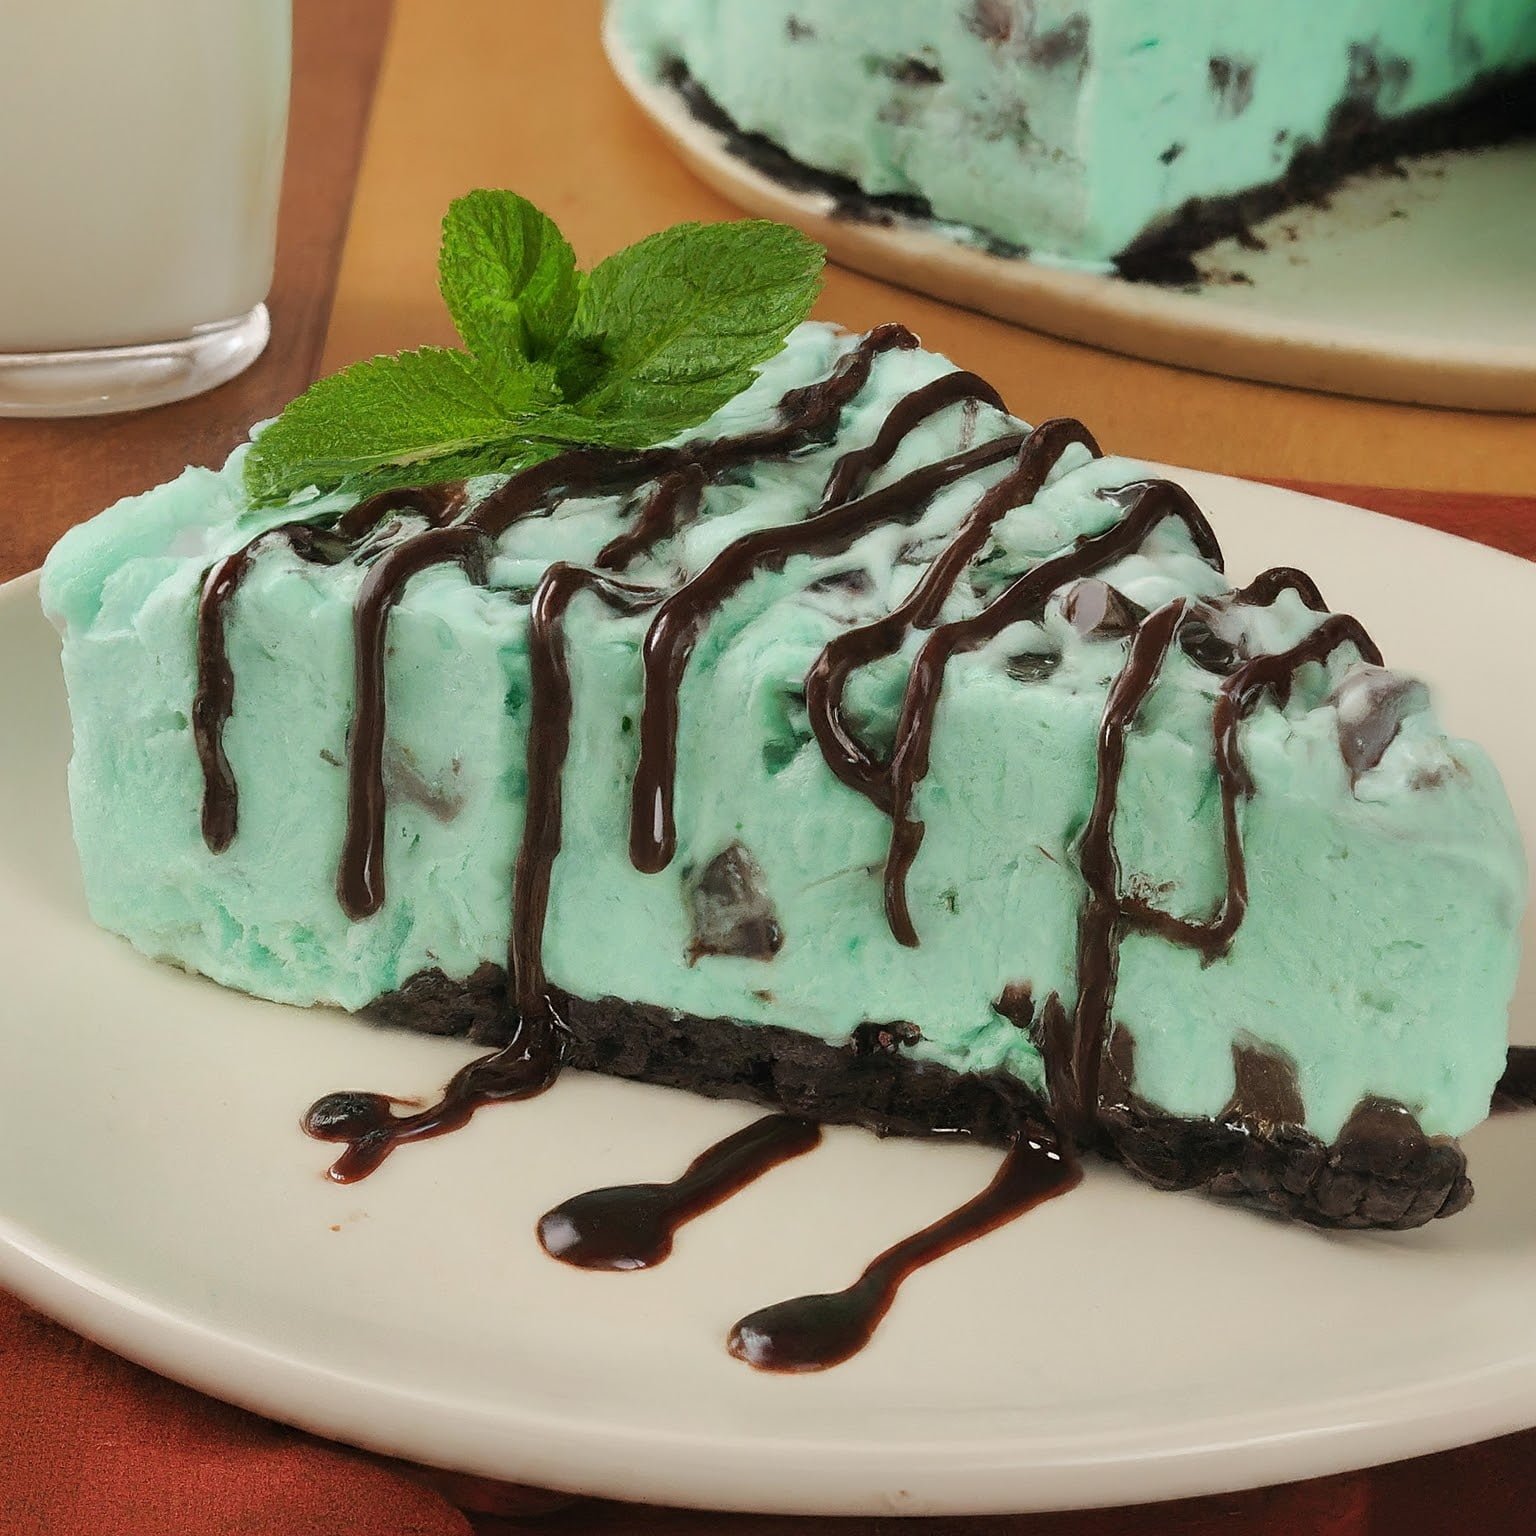
Spring has sprung, and Easter is hopping right around the corner! If you’re looking for a dessert that’s both festive and easy to make, look no further than this Mint Chocolate Chip Ice Cream Cake.

This recipe is perfect for beginner bakers and busy bees alike. It requires minimal ingredients and effort, yet yields a show-stopping dessert that will impress your guests.

Ingredients:

  • For the Chocolate Cake Crust:
  • 1 1/2 cups all-purpose flour
  • 3/4 cup unsweetened cocoa powder
  • 1/2 teaspoon baking soda
  • 1/4 teaspoon salt
  • 1/2 cup unsalted butter, softened
  • 1 cup granulated sugar
  • 1 large egg
  • 1/4 cup milk
  • 1 teaspoon vanilla extract
  • For the Mint Chocolate Chip Ice Cream Layer:
  • 1.5 quarts mint chocolate chip ice cream, softened slightly

Instructions:

Preheat the Oven and Prepare the Pan

  1. Preheat your oven to 350°F (175°C). Grease and flour a 9×13 inch baking pan.

Make the Chocolate Cake Crust

  1. In a medium bowl, whisk together the flour, cocoa powder, baking soda, and salt. Set aside.

[Imagen of dry ingredients for the cake crust being whisked together in a bowl]

  1. In a large bowl, cream together the softened butter and sugar until light and fluffy. Beat in the egg until well combined.
  1. Stir in the vanilla extract and milk, then gradually add the dry ingredients until just combined.
  1. Pour the batter into the prepared pan and bake for 20-25 minutes, or until a toothpick inserted into the center comes out clean.

Assemble the Ice Cream Cake

  1. Let the cake cool completely, then spread the softened ice cream evenly over the top.

Tip: If the ice cream is too hard, you can soften it slightly by letting it sit at room temperature for 10-15 minutes. However, be careful not to let it melt completely.

Freeze and Slice

  1. Freeze the cake for at least 4 hours, or overnight, until firm.
  2. When ready to serve, let the cake soften slightly at room temperature for 5-10 minutes before slicing.

Tips:

  • For an extra festive touch, decorate the top of the cake with Easter sprinkles, chopped candy eggs, or fresh mint leaves.
  • This cake is best served immediately after taking it out of the freezer. If you need to make it ahead of time, you can store it in the freezer for up to a week.
  • You can use any flavor of ice cream you like for this recipe. However, mint chocolate chip is a classic Easter flavor that pairs perfectly with the chocolate cake crust.

Enjoy this delicious and easy Mint Chocolate Chip Ice Cream Cake! It’s the perfect way to celebrate Easter with your family and friends.

Bring the Sunshine to Your Easter Table with Pineapple Upside-Down Cupcakes!

Easter is a time for family, friends, and delicious food. This year, why not add a touch of sunshine to your dessert table with these adorable and easy-to-make Pineapple Upside-Down Cupcakes? They’re the perfect way to impress your guests without spending hours in the kitchen.

What You’ll Need:

  • 1/2 cup (1 stick) unsalted butter, melted
  • 1 1/2 cups packed light brown sugar
  • 24 maraschino cherries, drained
  • 1 (20-ounce) can crushed pineapple, drained (reserve 1/3 cup juice)
  • 1 box (18.25-ounce) pineapple cake mix
  • 1 1/3 cups water
  • 3 large eggs

Baking Essentials:

  • Muffin pan
  • Cupcake liners
  • Mixing bowls
  • Electric mixer
  • Toothpick

Let’s Get Baking!

Preheat the oven to 350°F (175°C). Line a muffin pan with cupcake liners.

Step 1: Caramelize the Sugar and Butter

In a small saucepan, melt the butter over medium heat. Add the brown sugar and cook, stirring constantly, until the sugar dissolves and the mixture becomes bubbly and golden brown, about 2-3 minutes.

Tip: Be careful not to overcook the sugar mixture, as it can burn easily.

Step 2: Assemble the Cupcake Bottoms

Divide the caramelized sugar mixture evenly among the prepared muffin cups. Top each with a maraschino cherry, pressing down gently.

Step 3: Make the Cake Batter

In a large bowl, whisk together the cake mix, water, and reserved pineapple juice until smooth. Add the eggs and beat on medium speed until well combined.

Step 4: Fill and Bake the Cupcakes

Pour the batter evenly over the prepared cupcake bottoms, filling each cup about 3/4 full.

Bake for 18-20 minutes, or until a toothpick inserted into the center comes out clean.

Step 5: Cool and Invert the Cupcakes

Let the cupcakes cool in the pan for 5 minutes. Then, using a knife, run it around the edges of each cupcake to loosen it. Carefully invert the cupcakes onto a wire rack to cool completely.

Step 6: Enjoy!

Once the cupcakes are cool, serve and enjoy! These delightful treats are sure to be a hit with everyone at your Easter gathering.

Tips for Success:

  • For a richer flavor, use dark brown sugar instead of light brown sugar.
  • If you don’t have maraschino cherries, you can substitute them with chopped nuts, diced pineapple, or even a sprinkle of cinnamon.
  • Let the cupcakes cool completely before inverting them, otherwise the caramelized sugar will be too hot and run everywhere.
  • These cupcakes can be stored at room temperature in an airtight container for up to 2 days.

With these simple tips and tricks, you’ll be a pineapple upside-down cupcake pro in no time! So, what are you waiting for? Get baking and bring a little bit of sunshine to your Easter celebration!

Lemon Ricotta Cookies with Lemon Glaze: The Easiest and Most Delicious Easter Treat! 

Spring is in the air, and Easter is just around the corner! What better way to celebrate than with some light, fluffy, and oh-so-lemony cookies? These Lemon Ricotta Cookies with Lemon Glaze are the perfect addition to your Easter brunch or dessert spread. They’re easy to make, require simple ingredients, and are guaranteed to be a crowd-pleaser.

Why You’ll Love These Cookies:

  • Simple and quick: This recipe comes together in under an hour, making it perfect for busy bakers.
  • Fresh and flavorful: The combination of lemon zest, ricotta cheese, and lemon glaze creates a delightful balance of sweet and tart flavors.
  • Soft and chewy: These cookies are soft and chewy on the inside with slightly crispy edges.
  • Perfect for any occasion: These cookies are perfect for Easter, spring showers, or any time you’re craving a delicious treat.

Ingredients:

  • 1 1/2 cups all-purpose flour
  • 1/2 teaspoon baking powder
  • 1/4 teaspoon salt
  • 1/2 cup unsalted butter, softened
  • 1 cup granulated sugar
  • 1 egg yolk
  • 1 teaspoon vanilla extract
  • 1/2 cup ricotta cheese
  • 1 tablespoon fresh lemon juice
  • 1 tablespoon lemon zest
  • 1 1/2 cups powdered sugar
  • 3 tablespoons fresh lemon juice

Instructions:

H3: Making the Cookie Dough

  1. Preheat oven to 375°F (190°C). Line baking sheets with parchment paper.
  2. In a medium bowl, whisk together the flour, baking powder, and salt. Set aside.
  3. In a large bowl, cream together the softened butter and sugar until light and fluffy. This will take about 3 minutes.
  4. Beat in the egg yolk and vanilla extract until well combined.
  5. Add the ricotta cheese, lemon juice, and lemon zest to the wet ingredients and mix until just combined.
  6. Gradually add the dry ingredients to the wet ingredients, mixing until just incorporated. Be careful not to overmix.

H3: Baking the Cookies

  1. Drop tablespoons of dough onto the prepared baking sheets. Leave about 2 inches of space between each cookie.
  2. Bake for 10-12 minutes, or until the edges are golden brown and the centers are slightly set.
  3. Let the cookies cool on the baking sheet for a few minutes before transferring them to a wire rack to cool completely.

H3: Making the Lemon Glaze

  1. In a small bowl, whisk together the powdered sugar and lemon juice until smooth and creamy.
  2. Once the cookies are cool, drizzle them with the lemon glaze.

Tips:

  • For a stronger lemon flavor, add an extra teaspoon of lemon zest to the dough.
  • If you don’t have ricotta cheese, you can substitute it with cream cheese.
  • Let the glaze set completely before storing the cookies.
  • Store the cookies in an airtight container at room temperature for up to 3 days.

These Lemon Ricotta Cookies with Lemon Glaze are sure to become your new favorite Easter dessert! They’re easy to make, delicious, and perfect for sharing with friends and family. So what are you waiting for? Get baking!

I hope you enjoy this recipe! Let me know in the comments below what your favorite Easter treats are.

Happy baking!

Chocolate Peanut Butter Eggs: The Easiest (and Most Delicious) Easter Treat Ever 

Easter is just around the corner, and what better way to celebrate than with a delicious and festive treat? These chocolate peanut butter eggs are so easy to make, they’re perfect for anyone, from experienced bakers to kitchen novices. Plus, they’re sure to be a hit with kids and adults alike!

Ingredients:

  • 1 cup creamy peanut butter
  • 2 1/2 cups powdered sugar
  • 1/4 cup unsalted butter, softened
  • 1/2 teaspoon vanilla extract
  • 1/8 teaspoon salt
  • 12 ounces semi-sweet chocolate chips
  • 1 teaspoon vegetable oil

Instructions:

Make the Peanut Butter Filling <center> </center>

  1. In a large bowl, cream together the peanut butter, powdered sugar, butter, vanilla extract, and salt until well combined.

Shape the Eggs <center></center>

  1. Using a spoon or cookie scoop, portion out the peanut butter mixture and roll each portion into a small ball.
  2. Shape each ball into an egg shape with your hands. Tip: If the dough is too sticky, you can chill it in the refrigerator for 30 minutes before shaping.

Freeze the Eggs <center> </center>

  1. Place the eggs on a baking sheet lined with parchment paper and freeze for at least 30 minutes, or until firm.

Melt the Chocolate <center> </center>

  1. In a double boiler or heatproof bowl set over simmering water, melt the chocolate chips and vegetable oil together, stirring frequently, until smooth and shiny.

Coat the Eggs in Chocolate <center></center>

  1. Working one at a time, dip each frozen egg into the melted chocolate, coating it completely.

Decorate and Serve <center></center>

  1. Allow the excess chocolate to drip off, then place the egg on a baking sheet lined with parchment paper.
  2. Before the chocolate sets, you can decorate the eggs with sprinkles, chopped nuts, or other desired toppings.
  3. Let the chocolate set completely, then enjoy!

Tips:

  • For a richer chocolate flavor, you can use dark chocolate chips instead of semi-sweet chocolate chips.
  • If you don’t have a double boiler, you can melt the chocolate in a microwave-safe bowl in 30-second intervals, stirring after each interval, until smooth.
  • The peanut butter eggs can be stored in an airtight container in the refrigerator for up to 2 weeks.

These chocolate peanut butter eggs are a fun and easy way to celebrate Easter. They’re also a great way to use up any leftover peanut butter you have on hand. So get creative, have fun, and enjoy this delicious treat!

Raspberry Almond Tart: The Easiest (and Most Delicious) Easter Dessert

Spring is in the air, and Easter is just around the corner! This year, ditch the stress of complicated desserts and whip up this easy and elegant Raspberry Almond Tart. With its flaky crust, creamy almond filling, and fresh raspberry topping, this tart is sure to impress your guests without you breaking a sweat.

Ingredients:

  • For the crust:
  • 1 1/4 cups all-purpose flour
  • 1/2 cup powdered sugar
  • 1/4 teaspoon salt
  • 1/2 cup (1 stick) cold unsalted butter, cubed
  • 1-2 tablespoons ice water
  • For the filling:
  • 1/2 cup almond flour
  • 1/3 cup granulated sugar
  • 1/4 teaspoon salt
  • 2 large eggs
  • 1/2 teaspoon almond extract
  • 1/4 cup unsalted butter, melted
  • 2 cups fresh raspberries

Instructions:

Making the Crust

  1. In a large bowl, whisk together the flour, powdered sugar, and salt.
  2. Using a pastry cutter or your fingertips, cut in the cold butter until the mixture resembles coarse crumbs.
  3. Gradually add ice water, one tablespoon at a time, until the dough just comes together. Be careful not to overmix, as this can make the crust tough.
  4. Form the dough into a disk, wrap it in plastic wrap, and refrigerate for at least 30 minutes.

Prepping the Filling

  1. In a medium bowl, whisk together the almond flour, sugar, and salt.
  2. Whisk in the eggs, one at a time, then stir in the almond extract and melted butter.
  3. Set the filling aside.

Assembling and Baking the Tart

  1. Preheat your oven to 375°F (190°C).
  2. On a lightly floured surface, roll out the chilled dough to a 12-inch circle.
  3. Carefully transfer the dough to a 9-inch tart pan and gently press it into the bottom and sides. Trim any excess dough around the edges.
  4. Line the crust with parchment paper and fill it with pie weights or dried beans. This will help prevent the crust from puffing up while baking.
  5. Bake the crust for 15 minutes. Then, remove the weights and parchment paper and bake for an additional 5-7 minutes, or until the crust is golden brown.
  6. Let the crust cool slightly.
  7. Once the crust is cool, pour the almond filling into the tart shell.
  8. Arrange the fresh raspberries on top of the filling in a single layer.
  9. Bake the tart for an additional 25-30 minutes, or until the filling is set and the edges are golden brown.

Tips for a Perfect Tart

  • For a richer flavor, toast the almond flour in a dry skillet over medium heat for a few minutes, stirring constantly, before adding it to the filling.
  • If you don’t have fresh raspberries, you can use frozen raspberries instead. Just thaw them completely and drain any excess liquid before using.
  • Let the tart cool completely before slicing and serving. This will allow the filling to set properly.
  • Dust the tart with powdered sugar or drizzle it with a simple glaze before serving for an extra touch of elegance.

Enjoy this beautiful and delicious Raspberry Almond Tart with your family and friends this Easter!

Additional Notes:

  • Feel free to get creative with the garnish! You could use sliced almonds, mint leaves, or even a sprinkle of edible flowers.
  • This tart can be stored at room temperature for up to 2 days, or in the refrigerator for up to 4 days.
  • This recipe is easily doubled to make a larger tart. Just use a 10-inch tart pan and adjust the baking time accordingly.

With its simple ingredients and easy-to-follow instructions

Banana Cream Pie Parfaits: The Easiest and Most Delicious Easter Dessert

Easter is a time for family, friends, and of course, delicious food. But who wants to spend hours in the kitchen when you can be enjoying the company of your loved ones? This is where these Banana Cream Pie Parfaits come in. They’re easy to make, require minimal ingredients, and are absolutely irresistible.

Ingredients:

  • 1 package (14.4 oz) vanilla wafer cookies
  • 2 ripe bananas, sliced
  • 1 instant vanilla pudding mix (cook and serve)
  • 2 cups milk
  • 1 cup heavy whipping cream
  • 1/4 cup powdered sugar
  • Easter sprinkles (optional)

Making the Parfaits:

Whip Up the Pudding

  1. In a medium saucepan, whisk together the milk and instant vanilla pudding mix according to the package instructions.
  2. Bring the mixture to a boil over medium heat, whisking constantly.
  3. Cook for 1 minute, or until thickened.
  4. Remove from the heat and let cool slightly.

Assemble the Parfaits

  1. In a separate bowl, whip the heavy whipping cream and powdered sugar together until stiff peaks form.
  2. To assemble the parfaits, crumble half of the vanilla wafers into the bottom of each serving glass.
  3. Top with a layer of sliced bananas.
  4. Add a layer of the cooled vanilla pudding.
  5. Repeat the layers of vanilla wafers, bananas, and pudding until the glasses are full.
  6. Top each parfait with a dollop of whipped cream and sprinkle with Easter sprinkles, if desired.

Tips:

  • For a richer flavor, use vanilla bean paste instead of vanilla extract in the whipped cream.
  • If you don’t have instant pudding mix, you can make your own. Just whisk together cornstarch, sugar, and salt in a saucepan. Then, whisk in milk and egg yolks. Cook over medium heat, whisking constantly, until thickened. Stir in vanilla extract and let cool.
  • To prevent the bananas from browning, toss them in a little bit of lemon juice or orange juice before layering them in the parfaits.
  • These parfaits can be made ahead of time and stored in the refrigerator for up to 24 hours.

These Banana Cream Pie Parfaits are the perfect way to end your Easter meal. They’re light, refreshing, and sure to please everyone at the table. So ditch the complicated desserts and give this easy and delicious recipe a try!

Easter Egg Sugar Cookies: The Easiest and Cutest Easter Dessert Recipe

Spring has sprung, and Easter is hopping right around the corner! What better way to celebrate than with some adorable and delicious Easter egg sugar cookies? This recipe is so easy that even the littlest bunnies can help out in the kitchen. Plus, it’s a fun and festive activity that will get everyone in the Easter spirit.

Ingredients:

  • 2 ¼ cups all-purpose flour
  • ½ teaspoon baking powder
  • ¼ teaspoon salt
  • ¾ cup (1 ½ sticks) unsalted butter, softened
  • ¾ cup granulated sugar
  • 1 large egg, at room temperature
  • 2 teaspoons pure vanilla extract
  • 1 cup powdered sugar
  • 3-4 tablespoons milk
  • Food coloring (optional)
  • Sprinkles (optional)

Instructions:

Making the Cookie Dough

  1. In a medium bowl, whisk together the flour, baking powder, and salt. Set aside.
  2. In a large bowl using an electric mixer on medium speed, cream together the butter and sugar until light and fluffy, about 2 minutes.
  3. Beat in the egg and vanilla extract until well combined.
  4. Gradually add the dry ingredients to the wet ingredients, mixing on low speed until just combined. Be careful not to overmix!

Chilling the Dough

  1. Shape the dough into a disc, then wrap it in plastic wrap and refrigerate for at least 30 minutes or up to overnight. Chilling the dough helps to prevent the cookies from spreading too much in the oven.

Rolling and Cutting Out the Cookies

  1. Preheat your oven to 375 degrees F (190 degrees C). Line baking sheets with parchment paper.
  2. On a lightly floured surface, roll out the dough to a thickness of about ¼ inch.
  3. Use Easter egg-shaped cookie cutters to cut out shapes from the dough. Re-roll the scraps as needed to use up all of the dough.

Baking the Cookies

  1. Place the cookies on the prepared baking sheets, leaving a little space between them.
  2. Bake for 8-10 minutes, or until the edges are golden brown.
  3. Let the cookies cool on the baking sheet for a few minutes before transferring them to a wire rack to cool completely.

Decorating the Cookies (Optional)

  1. Once the cookies are cool, it’s time for the fun part: decorating! You can use store-bought frosting, royal icing, or even melted chocolate to decorate your cookies.
  2. If you’re using royal icing, you can tint it with food coloring to create different colors.
  3. Get creative with your decorating! You can add sprinkles, candies, or even use a piping bag to write messages on your cookies.

Tips:

  • For chewier cookies, bake them for a minute or two less.
  • If your dough is too sticky, add a tablespoon of flour at a time until it becomes manageable.
  • If your royal icing is too thick, add a teaspoon of milk at a time until it thins out.
  • Let your creativity flow and have fun decorating your Easter egg cookies!

These Easter egg sugar cookies are sure to be a hit with everyone at your Easter celebration. They’re easy to make, adorable to look at, and delicious to eat. So grab your ingredients, put on your favorite Easter tunes, and get baking!

I hope you enjoy this recipe! Please let me know in the comments below what your favorite Easter treat is.

The Easiest (and Most Delicious!) Classic Carrot Cake with Cream Cheese Frosting for Easter

Carrot cake is a springtime staple, and for good reason! This classic dessert is moist, flavorful, and topped with a dreamy cream cheese frosting that’s simply irresistible.

Whether you’re a seasoned baker or just starting out, this recipe is perfect for you. It’s easy to follow, requires minimal ingredients, and yields a show-stopping cake that will have everyone asking for seconds.

Here’s what you’ll need:

For the cake:

  • 1 1/2 cups vegetable oil
  • 1/2 cup applesauce (or crushed pineapple)
  • 1 cup packed light brown sugar
  • 1 cup granulated sugar
  • 4 large eggs
  • 2 teaspoons vanilla extract
  • 3 cups all-purpose flour
  • 2 teaspoons ground cinnamon
  • 1/2 teaspoon ground nutmeg
  • 1/4 teaspoon ground ginger
  • 1/4 teaspoon ground cloves
  • 1 tablespoon baking powder
  • 1 teaspoon baking soda
  • 1 teaspoon salt
  • 4 cups grated carrots

For the cream cheese frosting:

  • 8 ounces cream cheese, softened
  • 1/2 cup unsalted butter, softened
  • 3 cups powdered sugar
  • 1 teaspoon vanilla extract
  • Pinch of salt

Instructions:

Preheat the oven and prep the pans

  1. Preheat your oven to 350°F (175°C). Grease and flour two 8-inch round cake pans.

Tip: For easy cleanup, line the bottom of each pan with a circle of parchment paper.

Make the cake batter

  1. In a large bowl, whisk together the oil, applesauce, brown sugar, and granulated sugar until well combined.

  2. Beat in the eggs one at a time, then stir in the vanilla extract.
  3. In a separate bowl, whisk together the flour, cinnamon, nutmeg, ginger, cloves, baking powder, baking soda, and salt.
  4. Gradually add the dry ingredients to the wet ingredients, mixing until just combined. Don’t overmix!
  5. Fold in the grated carrots.

Bake the cake

  1. Divide the batter evenly between the prepared cake pans.
  2. Bake for 30-35 minutes, or until a toothpick inserted into the center comes out clean.
  3. Let the cakes cool in the pans for 10 minutes, then transfer them to a wire rack to cool completely.

Make the cream cheese frosting

  1. In a large bowl, cream together the softened cream cheese and butter until smooth.
  2. Gradually add the powdered sugar, beating until light and fluffy.
  3. Stir in the vanilla extract and salt.

Frost the cake

  1. Once the cakes are cool, place one layer on a serving plate. Spread a layer of frosting over the top.
  2. Top with the second cake layer and frost the entire cake, including the sides.

Tip: For a more professional look, use a frosting spatula to smooth the frosting.

Optional decoration:

You can decorate your carrot cake with grated carrots, chopped nuts, or even carrot-shaped candies.

Enjoy!

This classic carrot cake is sure to be a hit with your family and friends. It’s the perfect dessert for Easter, spring celebrations, or any occasion.

Tips:

  • For a richer flavor, use dark brown sugar instead of light brown sugar.
  • If you don’t have applesauce, you can substitute it with crushed pineapple or mashed banana.
  • To make the frosting even creamier, add a tablespoon of milk or heavy cream.
  • Store leftover cake in an airtight container at room temperature for up to 3 days, or in the refrigerator for up to 5 days.

I hope you enjoy this recipe! Let me know in the comments below what your favorite Easter dessert is.

Say “Cheesecake!” to Spring with this No-Bake Berry Delight (Easy Easter Dessert Recipe!)

Spring is in the air, and what better way to celebrate than with a light, refreshing, and oh-so-delicious dessert? This no-bake cheesecake with a vibrant berry topping is the perfect answer. It’s easy enough for anyone to make, requires no special equipment, and is sure to be a crowd-pleaser.

Ingredients:

  • For the Crust:
  • 1 ½ cups graham cracker crumbs
  • ¼ cup unsalted butter, melted
  • 1 tablespoon sugar
  • For the Cheesecake Filling:
  • 16 ounces cream cheese, softened
  • ½ cup powdered sugar
  • ½ teaspoon vanilla extract
  • 1⅓ cups heavy whipping cream
  • 1 envelope (2 ¼ teaspoons) unflavored gelatin
  • ¼ cup water
  • For the Berry Topping:
  • 2 cups fresh or frozen berries (mixed berries, raspberries, or strawberries work well)
  • ¼ cup sugar
  • 1 tablespoon cornstarch
  • 1 tablespoon lemon juice

Instructions:

Make the Crust:

  1. In a medium bowl, combine the graham cracker crumbs, melted butter, and sugar. Mix well until the crumbs are evenly coated.
  2. Press the crumb mixture firmly into the bottom of a 9-inch springform pan.

Tip: Use a spoon or the back of a measuring cup to press the crumbs evenly into the pan and up the sides for a nice crust.

  1. Refrigerate the crust for at least 30 minutes while you prepare the filling.

Make the Cheesecake Filling:

  1. In a large bowl, using an electric mixer, beat the softened cream cheese, powdered sugar, and vanilla extract until smooth and creamy.
  2. In a separate bowl, whip the heavy whipping cream to stiff peaks. Gently fold the whipped cream into the cream cheese mixture until just combined.
  3. In a small saucepan, sprinkle the gelatin over the water. Let it sit for 5 minutes, allowing the gelatin to soften.
  4. Heat the gelatin mixture over low heat, stirring constantly, until the gelatin is completely dissolved. Do not let the mixture boil.
  5. Slowly pour the warm gelatin mixture into the cheesecake mixture, whisking constantly to incorporate it evenly.
  6. Pour the cheesecake filling over the chilled crust and smooth the top with a spatula.
  7. Refrigerate the cheesecake for at least 4 hours, or until set.

Make the Berry Topping:

  1. In a medium saucepan, combine the berries, sugar, cornstarch, and lemon juice.
  2. Bring the mixture to a simmer over medium heat, stirring constantly, until the berries soften and the sauce thickens.
  3. Let the berry topping cool slightly before spooning it over the chilled cheesecake.
  4. Refrigerate the cheesecake for at least another hour before serving.

Tips:

  • For a richer flavor, use full-fat cream cheese and heavy whipping cream.
  • Decorate the top of the cheesecake with additional fresh berries, whipped cream, or chocolate shavings before serving.
  • This cheesecake can be stored in the refrigerator for up to 3 days.

Enjoy this delightful and easy no-bake cheesecake with your loved ones this Easter!

Hoppy Easter with this Easy & Delicious Chocolate Mint Grasshopper Pie Recipe!

Spring is in the air, and Easter is just around the corner! This year, ditch the stress of baking complicated desserts and impress your guests with this easy and incredibly delicious Chocolate Mint Grasshopper Pie. It’s the perfect combination of rich chocolate, cool mint, and light and fluffy filling, all nestled in a crumbled Oreo crust.

Not only is this pie bursting with flavor, but it’s also:

  • Incredibly easy to make: With just a few simple ingredients and no baking required, this recipe is perfect for even novice bakers.
  • Ready in under 2 hours: This pie sets in the fridge, so you can whip it up quickly before your guests arrive.
  • A crowd-pleaser: The combination of chocolate and mint is a classic for a reason, and this pie is sure to be a hit with everyone at your Easter gathering.

Here’s what you’ll need to make this delightful dessert:

Ingredients:

  • For the crust:
  • 1 package (14.3 oz) chocolate sandwich cookies, crushed
  • 3 tablespoons unsalted butter, melted
  • For the filling:
  • 1 (3.9 oz) package instant chocolate pudding mix
  • 1 ½ cups cold milk
  • 8 oz container whipped topping, thawed
  • ¼ teaspoon mint extract
  • 2-3 drops green food coloring (optional)
  • For the topping:
  • Whipped topping
  • Andes mints, chopped (optional)

Instructions:

H3: Making the Crust

  1. In a food processor or blender, grind the chocolate sandwich cookies into fine crumbs.
  2. Transfer the crumbs to a bowl and mix with the melted butter until well combined.
  3. Press the crumb mixture evenly into the bottom and up the sides of a 9-inch pie plate.
  4. Refrigerate the crust for at least 30 minutes while you prepare the filling.

H3: Making the Filling

  1. In a large bowl, whisk together the chocolate pudding mix and milk until smooth and thickened.
  2. Fold in the whipped topping, mint extract, and green food coloring (if using) until just combined. Be careful not to overmix.

H3: Assembling the Pie

  1. Pour the filling into the prepared pie crust.
  2. Smooth the top with a spatula.

H3: Adding the Finishing Touches

  1. Cover the pie loosely with plastic wrap and refrigerate for at least 1 hour, or until set.
  2. Before serving, top the pie with additional whipped topping and chopped Andes mints (optional).

Tips:

  • For a richer chocolate flavor, use a dark chocolate pudding mix.
  • If you don’t have mint extract, you can substitute 1 teaspoon of vanilla extract.
  • To make the pie ahead of time, you can assemble it up to 24 hours in advance and store it in the refrigerator.
  • Let the pie sit at room temperature for about 10 minutes before slicing and serving.

Enjoy this delicious and festive Chocolate Mint Grasshopper Pie at your Easter celebration!

I hope this viral cooking article is helpful and brings joy to your Easter celebration!

Exit mobile version