Caramel Apple Cheesecake Bars: The Perfect Easy Easter Dessert

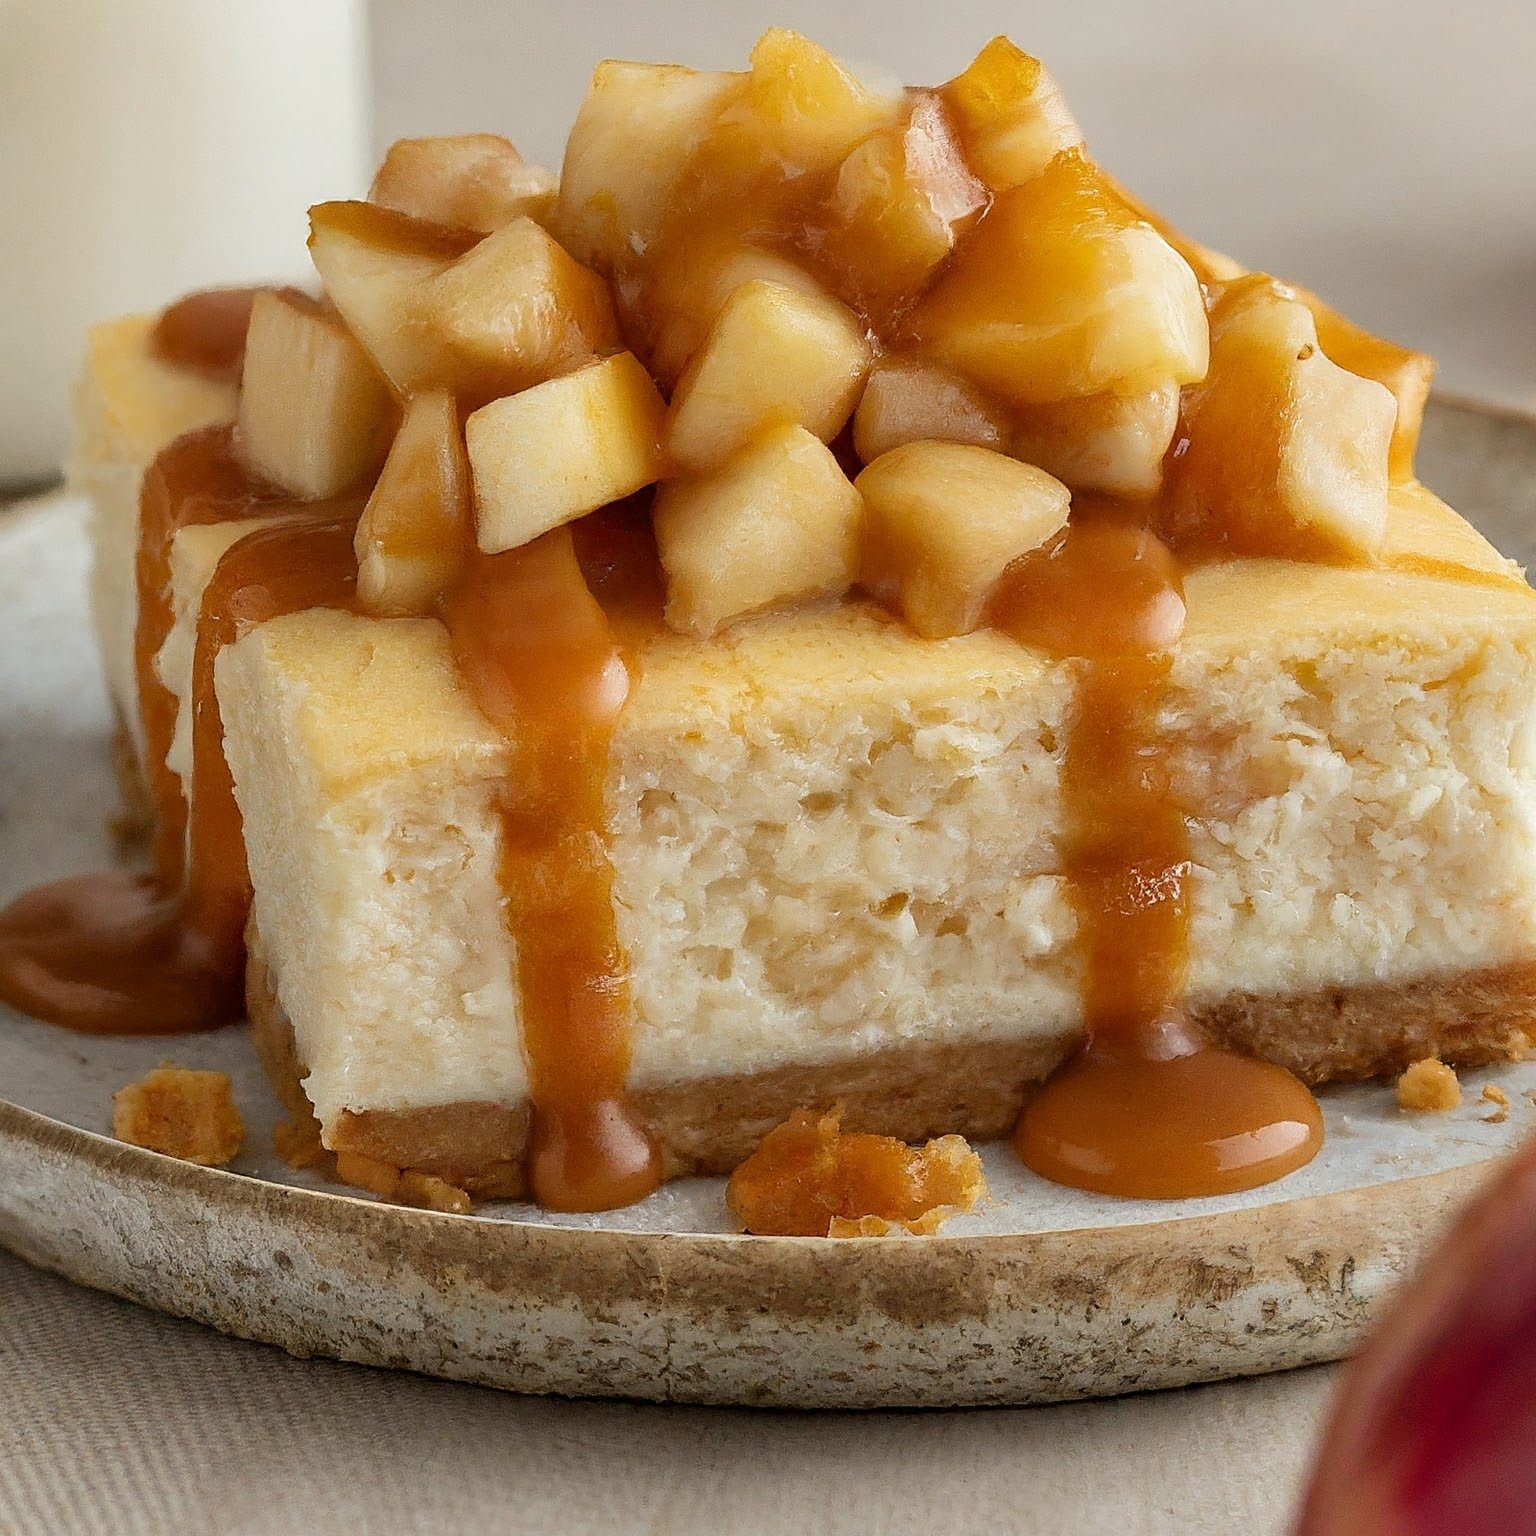
Easter is just around the corner, and that means it’s time to start thinking about dessert! If you’re looking for a recipe that’s easy to make, delicious, and sure to impress your guests, then look no further than these Caramel Apple Cheesecake Bars.

These bars are the perfect combination of creamy cheesecake, tart apples, and sweet caramel. They’re easy to make ahead of time, so you can relax and enjoy the holiday with your family and friends.

Ingredients:

  • For the crust:
  • 1 1/2 cups graham cracker crumbs
  • 1/2 cup melted butter
  • 1/4 cup brown sugar
  • For the cheesecake filling:
  • 3 packages (8 ounces each) cream cheese, softened
  • 3/4 cup granulated sugar
  • 2 large eggs
  • 1 teaspoon vanilla extract
  • 1/4 teaspoon salt
  • For the apple layer:
  • 3 apples, peeled, cored, and thinly sliced
  • 1/4 cup granulated sugar
  • 1 teaspoon ground cinnamon
  • 1/4 teaspoon ground nutmeg
  • For the caramel topping:
  • 1 bag (14 ounces) caramel candies, unwrapped
  • 1/4 cup heavy cream

Instructions:

H3: Making the Crust

  1. Preheat oven to 350 degrees F (175 degrees C). Line a 9×13 inch baking pan with parchment paper.
  2. In a medium bowl, combine the graham cracker crumbs, melted butter, and brown sugar. Mix until well combined.
  3. Press the crumb mixture into the bottom of the prepared baking pan.
  4. Bake for 10 minutes, or until lightly golden brown.

H3: Making the Cheesecake Filling

  1. In a large bowl, beat the cream cheese and sugar together until smooth and creamy.
  2. Beat in the eggs one at a time, then stir in the vanilla extract and salt.

H3: Making the Apple Layer

  1. In a medium bowl, combine the sliced apples, sugar, cinnamon, and nutmeg.
  2. Spread the apple mixture over the cooled crust.

H3: Making the Caramel Topping

  1. In a saucepan, melt the caramel candies and heavy cream together over low heat, stirring constantly, until smooth.

H3: Assembling the Bars

  1. Pour the cheesecake filling over the apple layer.
  2. Bake for 30-35 minutes, or until the cheesecake is set.
  3. Let the bars cool completely, then drizzle with the caramel topping.
  4. Cut into bars and serve.

Tips:

  • For a richer flavor, use brown butter in the crust. To brown butter, melt it in a saucepan over medium heat until it turns golden brown and has a nutty aroma.
  • If you don’t have caramel candies, you can use store-bought caramel sauce.
  • These bars can be stored in the refrigerator for up to 5 days.

I hope you enjoy this recipe for Caramel Apple Cheesecake Bars! They’re sure to be a hit with your family and friends.

Happy Easter!

Lemon Blueberry Layer Cake: The Perfect Easy Easter Dessert

Spring is in the air, and Easter is just around the corner! What better way to celebrate than with a delicious and refreshing cake? This Lemon Blueberry Layer Cake is the perfect dessert for your Easter gathering. It’s easy to make, bursting with fresh flavor, and sure to impress your guests.

Ingredients:

  • For the cake:
  • 1 1/2 cups (3 sticks) unsalted butter, softened
  • 1 1/2 cups granulated sugar
  • 1/2 cup packed light brown sugar
  • 4 large eggs, at room temperature
  • 1 tablespoon pure vanilla extract
  • 3 cups all-purpose flour, spooned and leveled
  • 1 tablespoon baking powder
  • 1/2 teaspoon salt
  • 1 cup buttermilk
  • 2 tablespoons lemon zest
  • 1/2 cup lemon juice (about 3 lemons)
  • 1 1/2 cups fresh or frozen blueberries (do not thaw frozen blueberries)
  • 1 tablespoon all-purpose flour
  • For the cream cheese frosting:
  • 8 ounces cream cheese, softened to room temperature
  • 1/2 cup unsalted butter, softened to room temperature
  • 3 1/2 cups powdered sugar
  • 1-2 tablespoons heavy cream
  • 1 teaspoon vanilla extract
  • Pinch of salt

Instructions:

Preheat the oven to 350°F (175°C). Grease and flour three 8-inch round cake pans.

Cream together the butter and sugars in a large bowl until light and fluffy.

Beat in the eggs one at a time, then stir in the vanilla extract.

In a separate bowl, whisk together the flour, baking powder, and salt.

Alternately add the dry ingredients and buttermilk to the wet ingredients, mixing until just combined.

Stir in the lemon zest and lemon juice.

In a small bowl, toss the blueberries with the 1 tablespoon of flour. Gently fold the blueberries into the cake batter.

Divide the batter evenly among the prepared cake pans.

[Imagen of Cake batter being divided evenly into three cake pans]

Bake for 25-30 minutes, or until a toothpick inserted into the center comes out clean.

Let the cakes cool in the pans for 10 minutes, then turn them out onto wire racks to cool completely.

While the cakes are cooling, prepare the cream cheese frosting.

In a large bowl, cream together the cream cheese and butter until light and fluffy.

Gradually add the powdered sugar, beating until smooth.

Stir in the heavy cream, vanilla extract, and salt until combined.

Once the cakes are cool, frost them with the cream cheese frosting. Decorate as desired.

Tips:

  • For a more intense lemon flavor, use both the zest and juice of Meyer lemons.
  • If you don’t have buttermilk, you can make your own by adding 1 tablespoon of vinegar or lemon juice to 1 cup of milk and letting it sit for 5 minutes.
  • To prevent the blueberries from sinking to the bottom of the cake, toss them with a little bit of flour before folding them into the batter.
  • This cake can be stored at room temperature for up to 3 days, or in the refrigerator for up to 5 days.

Enjoy this delicious and easy Lemon Blueberry Layer Cake! It’s the perfect way to celebrate Easter or any other special occasion.

I hope you enjoy this recipe! Be sure to share your photos and creations on social media using the hashtag #LemonBlueberryLayerCake.

Strawberry Shortcake Kabobs: The Easiest and Most Adorable Easter Dessert

Spring is in the air, and Easter is just around the corner! This year, ditch the traditional dessert and impress your guests with these adorable and delicious Strawberry Shortcake Kabobs. They’re easy to make, perfect for kids to help with, and sure to be a hit at any Easter gathering.

Ingredients:

  • 1 pound fresh strawberries, hulled and halved
  • 1 pound pound cake, cut into 1-inch cubes
  • 16 ounces whipped cream
  • White chocolate chips (optional)
  • Skewers

Instructions:

H3: Assembling the Kabobs

  1. Wash and hull your strawberries. Cut them in half if they are large.
  2. Assemble the kabobs by threading a strawberry half, a pound cake cube, and a dollop of whipped cream onto a skewer. Repeat this pattern until the skewer is full.

H3: Adding a Touch of Elegance (Optional)

  1. If you want to add a touch of elegance, melt some white chocolate chips in a microwave-safe bowl. Drizzle the melted chocolate over the kabobs using a spoon or piping bag.

H3: Tips for Success

  • Use ripe but firm strawberries for the best results. Soft strawberries will fall apart easily.
  • If you don’t have pound cake, you can substitute angel food cake, vanilla cupcakes, or even biscotti.
  • If you’re short on time, you can buy store-bought whipped cream.
  • These kabobs are best served chilled, so make them just before you’re ready to serve them.

Everyone will love these fun and festive Strawberry Shortcake Kabobs! They’re the perfect way to celebrate Easter with your family and friends.

Additional Easter Fun!

  • For an extra Easter touch, add a few maraschino cherries or sprinkles to your kabobs.
  • Get creative with your kabobs! You can use other fruits, such as blueberries or raspberries, or even add a small piece of marshmallow.
  • Serve your kabobs with a drizzle of honey or maple syrup for an extra sweet treat.

I hope you enjoy this recipe! Let me know in the comments below what your favorite Easter dessert is.

Happy Easter!

Butterscotch Pudding Pie: The Easiest and Most Delicious Easter Dessert

Easter is just around the corner, and everyone is looking for that perfect dessert to bring to the potluck or family gathering. Look no further than this Butterscotch Pudding Pie recipe! It’s easy to make, incredibly delicious, and sure to be a crowd-pleaser.

Ingredients:

  • For the Crust:
  • 1 1/2 cups graham cracker crumbs
  • 1/4 cup powdered sugar
  • 6 tablespoons unsalted butter, melted
  • For the Pudding:
  • 2 (3.4-ounce) packages instant butterscotch pudding mix
  • 2 cups cold milk
  • 12 ounces frozen whipped topping, thawed

Instructions:

1. Make the Crust:

In a large bowl, combine the graham cracker crumbs, powdered sugar, and melted butter. Mix until well combined and the crumbs are evenly moistened. Press the mixture into the bottom and up the sides of a 9-inch pie plate.

Tip: Use a measuring cup or the bottom of a flat-bottomed glass to press the crust firmly and evenly into the pie plate.

2. Chill the Crust:

Place the pie plate in the refrigerator for at least 30 minutes, or until the crust is firm.

3. Make the Pudding:

In a large bowl, whisk together the instant butterscotch pudding mix and cold milk until thickened, according to the package directions.

4. Fold in the Whipped Topping:

Gently fold in half of the thawed whipped topping into the pudding mixture until just combined. Be careful not to overmix, as the whipped topping can deflate.

5. Fill the Pie Crust:

Pour the pudding mixture into the chilled pie crust. Spread the pudding evenly over the bottom of the crust.

6. Top with Whipped Topping:

Spread the remaining whipped topping over the top of the pudding, creating a smooth and even layer.

7. Chill and Serve:

Cover the pie loosely with plastic wrap and refrigerate for at least 2 hours, or until the pudding is set.

Tips:

  • For a richer flavor, use brown sugar instead of powdered sugar in the crust.
  • If you don’t have a 9-inch pie plate, you can use a graham cracker crust from the store.
  • For a more decadent dessert, top the pie with a drizzle of butterscotch sauce or caramel sauce.
  • This pie can be stored in the refrigerator for up to 3 days.

Enjoy this delicious and easy Butterscotch Pudding Pie at your next Easter gathering!

I hope you enjoy this recipe! Be sure to share it with your friends and family, and let me know what you think in the comments below.

Happy Easter!

Calling All Bakers: Whip Up These Delightful White Chocolate Raspberry Scones for Easter! ** downloadphoto_prints

Easter brunch is just around the corner, and what better way to celebrate than with a delicious and easy dessert? These White Chocolate Raspberry Scones are the perfect answer! They’re bursting with fresh raspberries and creamy white chocolate, and they’re sure to be a hit with everyone at the table.

Here’s what you’ll need:

  • 2 ½ cups all-purpose flour
  • ¼ cup granulated sugar
  • 1 tablespoon baking powder
  • ½ teaspoon salt
  • ½ cup cold, unsalted butter, cubed
  • 1 large egg
  • ½ cup milk (plus extra for brushing)
  • 1 teaspoon vanilla extract
  • ½ cup white chocolate chips
  • ½ cup fresh raspberries

Baking Tips:

  • Use cold ingredients: This is essential for creating flaky scones. The cold butter creates pockets of steam as it bakes, resulting in a light and airy texture.
  • Don’t overmix the dough: Overmixing will develop the gluten in the flour, making your scones tough. Gently fold the ingredients together until just combined.
  • Brush with milk for a golden brown crust: Brushing the tops of the scones with milk before baking will give them a beautiful golden brown color.

Instructions:

Preheat the oven to 400°F (200°C) and line a baking sheet with parchment paper.

1. Whisk dry ingredients: In a large bowl, whisk together the flour, sugar, baking powder, and salt.downloadphoto_prints

2. Cut in cold butter: Using a pastry cutter or your fingertips, cut the cold butter into the dry ingredients until the mixture resembles coarse crumbs.downloadphoto_prints

3. Combine wet ingredients: In a separate bowl, whisk together the egg, milk, and vanilla extract.downloadphoto_prints

4. Form the dough: Add the wet ingredients to the dry ingredients and mix gently with a spatula until just combined. Fold in the white chocolate chips and raspberries.downloadphoto_prints

5. Shape and bake:

Turn the dough out onto a lightly floured surface and pat it into a circle about 1-inch thick. Cut the dough into 8 wedges. Place the wedges on the prepared baking sheet, leaving space between them for spreading. Brush the tops with milk.

6. Bake until golden brown:

Bake for 15-20 minutes, or until golden brown.

7. Cool and serve:

Let the scones cool slightly on the baking sheet before transferring them to a wire rack to cool completely. Dust with powdered sugar and serve warm, or at room temperature.

Enjoy these delicious and easy White Chocolate Raspberry Scones with your family and friends this Easter!

Optional additions:

  • For an extra decadent treat, drizzle the cooled scones with melted white chocolate.
  • If you don’t have fresh raspberries, you can use frozen raspberries instead. Just be sure to thaw them and drain off any excess liquid before adding them to the dough.
  • Add a pinch of lemon zest to the dry ingredients for a bright and refreshing flavor.

I hope you enjoy this recipe! Be sure to share your creations on social media using the hashtag #EasterScones.

Hop into Spring with these Adorable and Delicious Almond Joy Easter Bunny Cupcakes!

These delightful cupcakes are not only adorable to look at, but they’re also bursting with the irresistible flavor of Almond Joy candy bars.

Ingredients:

  • For the cupcakes:
  • 1 box (15.25 oz) devil’s food cake mix
  • 2 eggs, room temperature
  • 2 egg whites
  • 3/4 cup International Delight® Almond Joy™ coffee creamer
  • 1/2 cup sour cream
  • 1/2 cup unsalted butter, softened
  • For the frosting:
  • 1/2 cup unsalted butter, softened
  • 1/2 cup shortening
  • 4 cups powdered sugar
  • 1/3 cup International Delight® Almond Joy™ coffee creamer
  • 1 teaspoon vanilla extract
  • For the decorations:
  • Shredded coconut
  • Sliced almonds
  • Candy eyes
  • Pink candy melts
  • Mini marshmallows (optional)

Instructions:

Preheat the oven and prepare the cupcake pan:

  1. Preheat your oven to 350°F (175°C). Line a cupcake pan with cupcake liners.

Make the cupcake batter:

  1. In a large mixing bowl, cream together the softened butter and sugar using an electric mixer until light and fluffy.
  1. Beat in the eggs one at a time, then stir in the egg whites.
  1. Add the cake mix, sour cream, and Almond Joy™ coffee creamer to the bowl and mix until just combined. Don’t overmix!

Bake the cupcakes:

  1. Fill the prepared cupcake liners 3/4 full with batter.
  2. Bake for 15-17 minutes, or until a toothpick inserted into the center comes out clean.
  3. Let the cupcakes cool completely on a wire rack before frosting.

Make the frosting:

  1. In a large mixing bowl, cream together the softened butter and shortening until light and fluffy.
  2. Gradually add the powdered sugar, alternating with the Almond Joy™ coffee creamer, and beat until smooth and creamy.
  3. Stir in the vanilla extract.

Decorate the cupcakes:

  1. Frost the cooled cupcakes with a generous amount of frosting.
  2. While the frosting is still wet, sprinkle with shredded coconut.
  3. To make the bunny ears, cut two slices diagonally from each sliced almond to create pointed ears. Place two almond slices on each cupcake to form the ears.
  4. Add candy eyes and a pink candy melt nose using a small amount of frosting to adhere them.
  5. For an extra touch, add a mini marshmallow cut in half to create bunny teeth (optional).

Tips:

  • For a richer chocolate flavor, use dark chocolate cocoa powder in place of the devil’s food cake mix.
  • If you don’t have International Delight® Almond Joy™ coffee creamer, you can use regular

Vanilla Bean Panna Cotta with Berry Compote: The Easiest (and Most Elegant) Easter Dessert

Looking for a show-stopping dessert that’s surprisingly simple to make? Look no further than this Vanilla Bean Panna Cotta with Berry Compote. It’s the perfect combination of creamy, rich panna cotta and a sweet and tart berry compote, all topped with a touch of fresh mint for an extra refreshing finish.

This recipe is perfect for Easter brunch, a spring dinner party, or even a special weeknight treat. It’s sure to impress your guests with its elegant presentation and delicious flavor.

Here’s what you’ll need:

  • For the Panna Cotta:
  • 1 1/2 cups heavy cream
  • 1/2 cup sugar
  • 1 vanilla bean, split and scraped
  • 2 tablespoons cold water
  • 2 teaspoons unflavored gelatin
  • For the Berry Compote:
  • 1 cup fresh or frozen berries (such as strawberries, raspberries, blueberries, or a combination)
  • 1/4 cup sugar
  • 1 tablespoon lemon juice
  • 1 tablespoon cornstarch
  • Fresh mint sprigs, for garnish (optional)

Making the Panna Cotta:

  1. Heat the cream and vanilla: In a medium saucepan, combine the heavy cream, sugar, and vanilla bean pod. Heat over medium heat, stirring occasionally, until the sugar dissolves and the mixture comes to a simmer. Do not let it boil.

Tip: For an extra special touch, use a real vanilla bean instead of vanilla extract. The vanilla bean pod adds a richer, more complex flavor to the panna cotta.

  1. Bloom the gelatin: While the cream mixture is heating, sprinkle the gelatin over the cold water in a small bowl. Let it sit for 5 minutes, or until the gelatin softens.
  2. Temper the gelatin: Once the cream mixture is simmering, remove it from the heat. Stir in the softened gelatin mixture until it is completely dissolved.

Tip: Tempering the gelatin means slowly adding the hot liquid to the cold gelatin mixture to prevent it from clumping.

  1. Strain and chill: Strain the cream mixture into a bowl to remove any vanilla bean specks. Pour the mixture into individual serving glasses or ramekins. Cover with plastic wrap and refrigerate for at least 4 hours, or until set.

Making the Berry Compote:

  1. Combine the berries, sugar, and lemon juice: In a small saucepan, combine the berries, sugar, and lemon juice. Bring the mixture to a simmer over medium heat, stirring occasionally, until the berries soften and release their juices.
  2. Thicken the compote: In a small bowl, whisk together the cornstarch with a tablespoon of water until smooth. Stir the cornstarch mixture into the simmering berry mixture. Cook for an additional minute, or until the compote thickens slightly.
  3. Cool and chill: Remove the compote from the heat and let it cool completely. Once the panna cotta is set, spoon the cooled berry compote over the top.

Serving and Tips:

  • Garnish with fresh mint: For an extra touch of elegance, garnish each serving with a fresh mint sprig.
  • Make it ahead: Panna cotta can be made up to 24 hours in advance. Simply store it in the refrigerator until you’re ready to serve.
  • Get creative with the toppings: You can also top your panna cotta with other toppings, such as chopped nuts, chocolate shavings, or a drizzle of caramel sauce.

With its simple ingredients and easy-to-follow instructions, this Vanilla Bean Panna Cotta with Berry Compote is the perfect recipe for anyone who wants to impress their guests with a homemade dessert. So ditch the store-bought treats and give this recipe a try! You won’t be disappointed.

Chocolate Chip Cookie Dough Easter Eggs: The Easiest (and Most Delicious) Easter Treat Ever!

Easter is just around the corner, and that means it’s time to start thinking about delicious treats! This year, why not ditch the traditional candy and try something a little more unique? These Chocolate Chip Cookie Dough Easter Eggs are the perfect combination of fun and festive, and they’re sure to be a hit with everyone at your Easter gathering.

Here’s what you’ll need:

  • 1/2 cup (1 stick) unsalted butter, softened
  • 1/2 cup packed light brown sugar
  • 1/4 cup granulated sugar
  • 1 teaspoon pure vanilla extract
  • 1 cup all-purpose flour
  • 1/4 teaspoon salt
  • 1/3 cup mini chocolate chips
  • 8-10 plastic Easter eggs

Instructions:

H3: Making the Cookie Dough

  1. In a large bowl, cream together the butter, brown sugar, and granulated sugar until light and fluffy. Beat in the vanilla extract.
  2. In a separate bowl, whisk together the flour and salt. Gradually add the dry ingredients to the wet ingredients, mixing until just combined.
  3. Stir in the mini chocolate chips.

H3: Filling the Easter Eggs

  1. Carefully open the plastic Easter eggs and remove the tops.
  2. Using a spoon or piping bag, fill each egg with cookie dough, leaving a little bit of space at the top.
  3. Gently press the tops of the eggs back on.

H3: Chilling and Serving

  1. Place the filled Easter eggs in the refrigerator for at least 2 hours, or until the cookie dough is firm.
  2. Serve chilled and enjoy!

Tips:

  • For an extra special touch, you can melt some white chocolate chips and drizzle them over the Easter eggs before serving.
  • If you don’t have any mini chocolate chips, you can use chopped nuts or dried fruit instead.
  • Be sure to use heat-treated flour in your cookie dough if you’re not going to bake it. This will help to prevent the risk of foodborne illness.

These Chocolate Chip Cookie Dough Easter Eggs are the perfect way to celebrate Easter with your loved ones. They’re easy to make, delicious to eat, and sure to be a crowd-pleaser!

I hope you enjoy this recipe! Be sure to share your photos and creations on social media using the hashtag #ChocolateChipCookieDoughEasterEggs.

Berry Trifle with Angel Food Cake: Easy Easter Dessert Recipe

Spring is in the air, and Easter is just around the corner! This year, ditch the stress of complicated desserts and whip up this easy and delightful Berry Trifle with Angel Food Cake. It’s a show-stopping dessert that’s perfect for any gathering, and it’s sure to impress your guests with its festive layers of light, fluffy cake, sweet berries, and creamy whipped cream.

Ingredients:

  • 1 angel food cake (store-bought or homemade)
  • 2 cups mixed berries (strawberries, raspberries, blueberries, etc.)
  • 1 cup heavy whipping cream
  • 1/4 cup powdered sugar
  • 1 teaspoon vanilla extract
  • 1 cup vanilla pudding mix
  • 1 1/2 cups milk

Making the Berry Trifle:

H3: Prepare the Berries

  1. Wash and dry your berries thoroughly.
  2. If using larger berries like strawberries, slice them into bite-sized pieces.

H3: Whip Up the Cream

  1. In a chilled bowl, whip the heavy cream with an electric mixer on high speed until stiff peaks form.
  2. Gradually add the powdered sugar and vanilla extract while continuing to mix until combined.

H3: Make the Vanilla Pudding

  1. In a separate bowl, whisk together the vanilla pudding mix and milk according to package instructions.
  2. Let the pudding sit for a few minutes to thicken.

H3: Assemble the Trifle

  1. Gather your ingredients and a beautiful trifle bowl.
  2. Start by cutting the angel food cake into 1-inch cubes.
  3. Create the first layer by adding a third of the cake cubes to the bottom of the trifle bowl.
  4. Top the cake with half of the whipped cream, spreading it evenly.
  5. Next, add half of the prepared berries, making sure they are evenly distributed.
  6. Pour half of the vanilla pudding over the berries, creating a smooth layer.
  7. Repeat steps 3-6 to create another layer of cake, whipped cream, berries, and pudding.
  8. Finally, top the trifle with the remaining cake cubes, whipped cream, and berries.

Tips:

  • For a richer flavor, you can use homemade whipped cream instead of store-bought.
  • Feel free to get creative with the berries! You can use any combination of your favorites, or even add other fruits like sliced peaches or mangoes.
  • Want to make it ahead of time? Assemble the trifle up to 24 hours in advance, but keep it covered in the refrigerator until serving.

Serve your Berry Trifle with Angel Food Cake chilled and enjoy the compliments! This easy and delicious dessert is sure to be a hit at your Easter celebration.

Dive into Deliciousness: Flourless Chocolate Cake – The Easiest Easter Treat Ever!

Calling all chocoholics and dessert enthusiasts! Are you looking for a show-stopping Easter dessert that’s effortless to prepare and guaranteed to impress? Look no further than this Flourless Chocolate Cake recipe! This decadent cake is not only gluten-free but also surprisingly simple to make, requiring minimal ingredients and no fancy equipment.

Here’s what you’ll need:

  • 8 ounces high-quality dark chocolate, chopped
  • 1/2 cup unsalted butter, cubed
  • 3/4 cup granulated sugar
  • 1 teaspoon vanilla extract
  • 3 large eggs
  • 1/2 cup unsweetened cocoa powder
  • Pinch of salt

Baking essentials:

  • 8-inch springform pan
  • Parchment paper
  • Mixing bowls
  • Electric mixer

Let’s get baking!

Melting the Magic: Chocolate and Butter

  1. Preheat your oven to 350°F (175°C). Grease the bottom and sides of your springform pan with butter and line the bottom with parchment paper. This ensures easy removal of the cake later.

  2. In a heatproof bowl, combine the chopped chocolate and cubed butter. Place the bowl over a pot of simmering water, ensuring the bottom of the bowl doesn’t touch the water.
  3. Using a rubber spatula, gently stir the mixture until the chocolate and butter are completely melted and smooth. Remove the bowl from the heat.

Pro Tip: If you don’t have a double boiler, you can melt the chocolate and butter in the microwave in short bursts, stirring frequently, until smooth. Be careful not to overheat, as chocolate can scorch easily.

Sweetening the Deal: Adding Sugar and Eggs

  1. Whisk in the granulated sugar and vanilla extract to the melted chocolate mixture until fully incorporated.
  2. Add the eggs one at a time, whisking well after each addition until the batter becomes smooth and glossy.

Pro Tip: Ensure your eggs are at room temperature for even mixing. Cold eggs can cause the batter to seize.

Cocoa Magic: Folding in the Dry Ingredients

  1. In a separate bowl, sift the cocoa powder and salt together. This helps to remove any lumps and ensures a smooth cake texture.
  2. Gently fold the dry ingredients into the wet ingredients using a rubber spatula. Be careful not to overmix, as this can result in a tough cake.
  3. Pour the batter into your prepared springform pan and smooth the top with a spatula.

Baking to Perfection: Time for the Oven

  1. Bake the cake for 25-30 minutes, or until a toothpick inserted into the center comes out with moist crumbs. Don’t expect the cake to be completely dry, as it will continue to set as it cools.
  2. Let the cake cool completely in the pan on a wire rack before removing it. The cake will sink slightly in the center, which is perfectly normal.

Pro Tip: Running a knife around the edges of the cake before unmolding helps to loosen it from the pan.

Decoration Inspiration: Get Creative!

Once your cake is cool, it’s time to unleash your inner artist! Here are some Easter-inspired decoration ideas:

  • Dust the cake with powdered sugar for a snow-like effect.
  • Drizzle with a simple raspberry coulis for a burst of tartness.
  • Top with fresh berries, chocolate shavings, or chopped nuts.
  • Pipe whipped cream rosettes around the edge of the cake and nestle mini chocolate eggs in the center.

No matter how you choose to decorate it, this Flourless Chocolate Cake is sure to be a delightful addition to your Easter celebration.

Remember, baking is all about having fun and expressing yourself. So, get creative, enjoy the process, and most importantly, savor the delicious results!

Happy Easter and happy baking!

Exit mobile version